Monday, March 26, 2012

The Seven Day Wardrobe

I am one of those people who is blessed to have an extensive wardrobe, but "never has anything to wear". This means that waste precious time in the morning basically putting on a fashion show and wishing I had done laundry the night before or hemmed those pants sitting in the mending pile. I created this system several years ago and it worked really well, but then I moved and lost my tags. Right now my life is really busy, and I don't have time every night to get ready, so I'm bringing this system back. This is a relatively simple task, and even though it may take a few hours, will shave time off of your morning routine.

The Formula
Step 1: Make These Tags
            Supplies: rubber bands, marker, index cards

Step 2: Clear a large surface i.e. your bed or table to lay out your options.
Step 3: Check the weather for the week, while this may change, it will still give you a guideline.

Step 4: Consult your schedule, mark any important meetings or events that require any specific type of attire
I have a networking event on Tuesday, after a full day of video training, so I chose a casual outfit that still represents my personality enough for an event.
Step 5: Pick out clothes to create an outfit. This may include trying items on, ironing, and/or a load of emergency laundry.

The pants and the sweater for this outfit are in the washer.
Step 6: Choose coordinating shoes, and to really save time, choose accessories as well.

Step 7: Hang outfits with tag on the hangers, and place shoes underneath or arranged elsewhere in the correct order.

Monday Tuesday Wednesday Thursday Friday Saturday


Every week just follow steps 2-7 and you'll be amazed at how much smoother your mornings will run!


Sunday, March 25, 2012

First Week of Spring!


Tuesday was "Free Water Ice" Day at Rita's Water Ice to celebrate the first day of spring. I ended up standing in line for 40 minutes...but my tangerine and cherry water-ice tasted great! After grabbing some dinner, I went to FLP Business Workshop on Intellectual Rights. I got some great information, some great tips and resources and I even  got a request for alterations. This isn't the first request I have received, so I decided that I need to create a price list.

Thursday I won free tickets to Jiro Dreams of Sushi It is the first thing that I have ever won, so I was super excited! It is a beautiful story about passion and hard work, plus the food looks great. I highly recommend that you eat before the film!

I stumbled across this awesome deejay via Twitter, Chaisley Lussier. Her Ca ne Fait mix will definitely brighten up your mood!

Saturday I worked on patterns for costumes and then attended a fashion show featuring Palmieri Jeans, House of Charles Gregory , KontraBand 215 and Ramona's Touch of Essence at Yesha Hall in South Philly.


Check out my Facebook Page for more photos! See you next week. -JRochelle


Monday, March 19, 2012

The Ragdoll Project: Meet Rebecca!


Rebecca"s Story: My name is Rebecca. I am a 13year old ballet dancer from Toledo, Ohio. I live with my parents, my younger sister Melissa, my younger brother Harry and our dog Tiger. One day after a big recital, a woman, Emily, came up to me said she was an agent and gave me her card. She told me that she was a friend with my dance teacher, and that she could get me an audition for a show. I was really excited. I didn’t tell my parents because I wanted to surprise them with the money. The next Saturday, I told my parents I was going to a friend’s house after rehearsal. Instead Emily picked me up and took me to the audition. Emily did my hair, put makeup on my face and helped me change into my costume. Afterwards Emily said that I got the job, and she gave me 200 dollars. I’ve never had that much money before in my whole life. Emily said that she would pick me up the next night for rehearsal and the first show. I told my parents I was sleeping over at a friend’s house. We got the place, and it looked different at night. There were bright lights and neon signs. It made me a little bit nervous. Emily helped me get ready again, and she even gave me a new costume and high heel shoes. The costume was really pretty even though it was a little too small. When I went out on stage, there were a lot of men. I did my routine and they started to throw money at me and they tried to touch me. I was scared, but I looked at Emily and she smiled at me. After the first week she wasn’t as nice and said that I would have to start stripping like everyone else because a big producer was coming. It was the most humiliating experience ever, and she took pictures. She said that if I told anyone or tried to quit. She would send the photos to my parents. I was so embarrassed and ashamed and overwhelmed. I worked at the strip club for Emily almost every night for the next year, until my parents found out, and she got arrested. I just wanted to be a famous ballerina.
This is a fictional story, loosely based on the experiences of Theresa Flores, victim/survivor and author of “The Sacred Bath: An American Teen’s Story of Modern Day Slavery”.


Title and Date: Rebecca 2012
Artist: Jeannette R. Geter/J.Rochelle Designs
Medium: cotton, embroidery floss, yarn, plastic buttons, polyester fill       
Dimensions:   11.5”x4”     


Ragdoll: Part 2

Be warned this is post is overloaded with photos!!!

Here is part one where I started the doll. After cutting the pattern pieces out of fabric, I finished the face with embroidery floss and buttons.

 I decided that I wanted the hair to look more "natural", so I used Lisa (my styrofoam head) to create strips like hair extensions. 

  After sewing the strips of yarn hair extensions to the fabric, the next step was to sew everything together.

 I tucked the hair inside and pinned all of the fabric pieces together with the images facing each other.


The most difficult part in all of this is turning the legs and arm turned right side out. I used a paintbrush, plastic yarn needle embroidery scissors and a seam ripper. I have never figured out a smooth technique,
    but the seam ripper is my favorite tool, even though you risk piercing holes in the fabric.

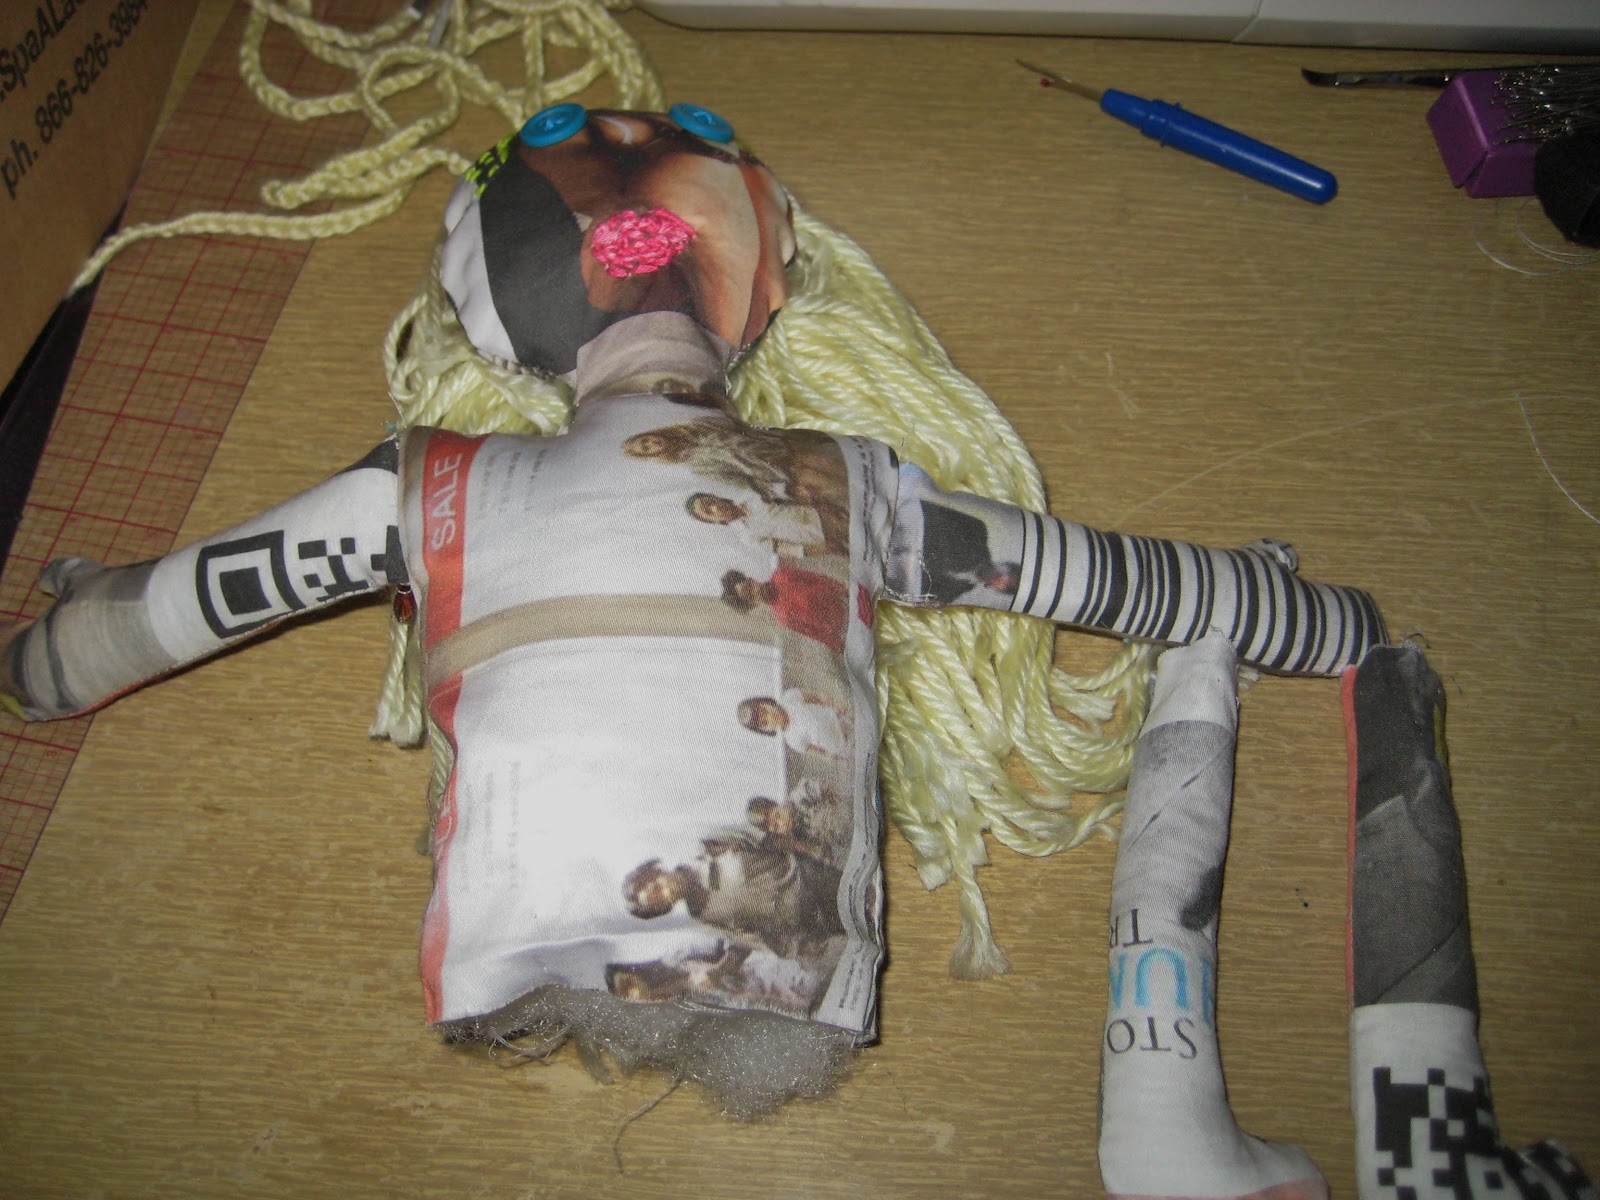
 After getting all of the limbs right side out, I filled them with poly-fill and then sewed them to the torso of the doll.

 After the arms were sewn to the torso, Yvette (my sewing machine) and I sewed up the edges, and then got to my least favorite part, turning the entire doll right side out.


Turning the doll inside out was a workout! I even had to rip a seam in the neck to create extra ease to release all of her hair. I stitched up the hole and then filled her with poly-fill. I used a locking hem stitch to do the repair.


 I realized that the torso was a little too short and she looked off balanced, so I added an extension, and then sewed on her legs, and re-filled her torso with poly-fill.
 
I gave her a hair cut, and made her a tutu. Check out the next post to see the final results!


Tuesday, March 13, 2012

Ragdoll: Part One

Today I started working on my entry for The Ragdoll Project. The Ragdoll Project is a campaign to promote awareness about human trafficking and and commercial sexual exploitation. There is an art exhibition sponsored by the Philadelphia Women's Caucus for Art at the F&N Gallery in Northern Liberties. I am not sure what my final submission will be, if it is just the doll or a series of photos featuring the doll, but I started by finding images on line and printing them on these paper-backed cotton sheets.


 After printing out a collage of images, I created a free-form pattern of the doll. Next I used my trusty ruler to make sure the form was symmetrical and to make sure that the dimensions were uniform. I generally don't use pen, but did so for the blog. I added 1/4 inch seam allowance to all of the sides. *Seam allowance is the part of the fabric that will become the seam inside of the garment or in this case the doll.*


I then, cut out the pattern pieces and separated the printed cotton from the backing.
 Next I pinned the pattern pieces to the fabric. This was the tricky part. I had to remember to flip the arms and legs over to get to opposite limbs instead of two left arms and two right legs.In order to make it seem more life like, I decided to add thumbs and toes, so it would have been obvious if I cut them out wrong.

 (Sorry for the sideways pics; even though I edited them Blogger only likes the original version...)
 After cutting out the body and all of the arms and legs, it was time to concentrate on the face and other details. I drew the features on with tailor's calk and then picked out some embroidery floss to use. I use a tapestry needle. It has a blunt tip which is tough, but the eye is big enough for the floss, so it was my best option.
   
Here is where I am so far. 
Next post I'll show you how I finish the face and sew the pieces together.